When it comes to household projects sanding a deck is one of the simplest but most cumbersome tasks. Depending on the size and shape of your deck this project will vary in difficulty. What we aim to do is give you a guide to follow of how to use a belt sander on a deck.
There are a few essential steps to turn your old splinter-ridden leisure area into a smooth relaxation spot. We’re going to discuss them in detail to make sure you have the knowledge to get this task done in a timely and professional manner.
A crucial part of this having the right tool in your hands.
Tools
Before you embark on this adventure you’ll want to make sure you have the right equipment. It’s better to have everything on site first and then proceed. Rather than having to halt the project to run out and get more equipment. Here is a list of items you’ll need to complete the project.
Hammer / Drill
The hammer is used for knocking down any loose nail heads that might be sticking up through the wood. There are plenty of great hammers, but you might try the Stanley STHT51512 16 Oz Curve Claw Fiberglass Hammer. It has a great fiberglass core which adds strength and durability.
If screws were used (which is most likely) bring a cordless drill with you. There are a lot of great options on the market.
Belt Sander
When you’re working on a large surface area this tool will not only save you time it will save your hands. This is the most important tool you’ll be using during this project. Check out the best sanders for a deck on the market if you don’t already have one.
Power Washer
Power washing your deck is a wise first step to prep for sanding. You might check out the Sun Joe SPX3000, it has great power and it’s one of the least expensive models.
Beyond these three main tools, you should be covered for your project. You’ll want to think about wearing the appropriate safety gear. Eye protection for loose sawdust and likewise a dust mask. You will also want to consider knee pads this will help prevent aching knees the next day.
Steps
1. Wash the Deck
The first step of the whole process is washing your deck. The reason being is when wood is soaked it expands and will leave splinters exposed. Power washing also helps to clear the deck of debris and dust build up.
The first thing you’ll want to do is set the psi between 1,000 to 2,000 this is the ideal pressure for this project. It’s wise to err on the side of the lower psi setting because too much pressure can damage the deck. An added measure is to add cleaners to the mixture this will help improve quality.
Once you have the power washer psi set the next step is to examine the deck. Look for any warped, cracked or weathered boards. You’re more than welcome to keep them but for a quality job consider removing the boards.
When you begin to wash your deck make sure to hold the tip at a 25 to 30-degree angle as you move across the wood. For the easiest pattern, it’s best to start at the furthest point of the deck. Begin with the railing and work your way down and back toward the entrance of the deck.
2. Prep the Deck
Once you’ve completed the washing process it’s best to wait 48 hours for the wood to dry. After the wood dries look for any nails that are sticking up out of the wood. The last thing you want is to catch your sander on one. If there are screws grab a drill and drill the screws back in. Once the deck is prepped it’s time to move onto sanding.

3. Sand
When sanding an exterior wood resist the urge to sand the deck down to a smooth finish. Deck wood needs to keep its coarser finish to protect it from the weather. When you’re picking out sandpaper for this project make sure you stay between 60 to 80 grit. If you use a grit rating higher than this, it could hinder the staining process which helps your deck stay healthy.
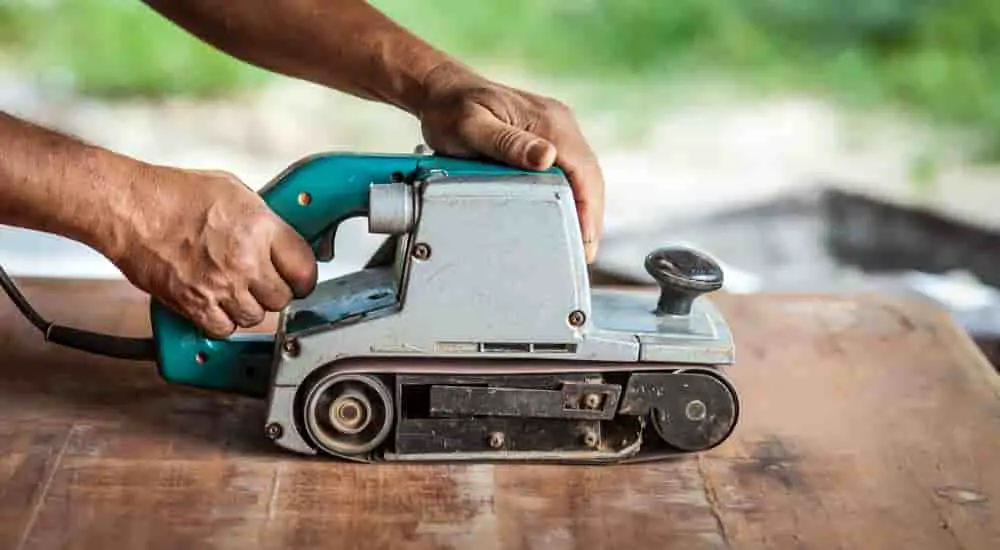
Belt sanders were designed to quickly sand off rough planks of wood. It’s better to work in small sections of the deck. As you’re operating the belt sander you’ll want to make sure you have a firm grip on the sander. The reason being the belt sander has a lot of power. Therefore, keep a hold onto it or it might get away from you.

With one hand on the trigger handle and the other on the forward handle ease the roller onto the surface. Once in contact with the wood apply light pressure. As you’re applying pressure, keep the sander moving with the grain in the general area. Because the belt sander is so powerful make sure to check the area frequently.
It’s important to realize when your belt needs to be changed. One way to realize the belt needs changing is the resistance you feel as you’re operating the sander. Often, you’re tempted to press down harder when the belt is wearing. It’s better to change the belt at this point to prevent wear and tear on your belt sander.
Once you make it across your deck and feel you’ve sanded it down, run back over the top with a broom and a cloth.
Safety
When you’re working with a power tool safety is should be a priority. Here are a few steps to take before you start.
- Wear eye protection. When you’re sanding, dust and loose debris will be flying into the air, to protect yourself wear safety glasses.
- Apply a mask. When working with wood especially when sanding wear a face mask. This will prevent you from inhaling fine dust particles and protect your lungs.
- Wear knee pads. This is not a necessary safety feature but it will save you some aches and pains. Anytime you’re on your knees for an extended period knee pads are a life saver.
- Make sure to wear tight-fitting sleeveless clothes. This will prevent loose clothes getting caught in the belt sander and causing injury.
To highlight what was covered on how to use a belt sander on a deck. Before you begin the project make sure you have the correct the tools to complete the job. Once you’re ready to start, the first thing you want to do is prepare the environment. The best way to do this is run a power wash over the top of the deck and hammer or drill down any loose nails or screws. This will make a clear path for your belt sander.
Remember to press down lightly on the wood and work with the grain in small sections. Check the status of the sanded area frequently until you’ve reached your desired outcome. Once finished clear excess sawdust and admire a hard day’s work.
Resources & Further Reading
- Deck Rescue: Renew Your Deck – FamilyHandyMan.com
- Tips for Sanding a Wood Deck – TheSpruce.com
- What is the difference between the different grits of sandpaper? – HowsStuffWorks.com
- Wood dust: controlling the risks – Worksafe.gov