How to Find and Repair a Leaking Roof
How to Guides, Tips & Ideas
A leaking roof can be a recipe for chaos and also make a house inhabitable. It becomes worse if, by any chance, there are naked electrical cables along the leaking lines as any contact with water can be disastrous. These misfortunes can, however, be avoided by learning how to fix a roof by yourself, the crucial topic that this write up seeks to cover.
A roof leak can present multiple challenges to homeowners until it is identified and rectified. The major challenge is that leaks never happen at a convenient time but rather catch you off-guard. This means that they may cause significant damage before you find and work on them.
The usual signs that can point to a possible leak are the sight and sound of water dripping. There are also several other telltale signs that you may discover along the way, whether it is raining or not. The signs include:
- The presence of musty odors in some of your rooms.
- The sight of spots on your home’s exterior walls.
- Signs of water stains on the ceiling or roof.
- Missing or warped shingles.
- Bulging patches on your interior walls.
On This Guide:
6 Methods To Find A Roof Leak
The above signs may point to a possible leak somewhere on your roof, but they may not point to the actual leaking point. In this case, you have to conduct a thorough investigation to establish the exact place with the leaking problem. Below are additional tips to help you to find a roof leak and ensure that it does not accelerate such problems.
- Method 1: Check the Attic
- Method 2: Perform A Rain Dance
- Method 3: Identifying Plumbing Leaks
- Method 4: Identifying Pest Infestation-Caused Leakages
- Method 5: Tear of Shingles
- Method 6: Check Dormers
Check the Attic
Tools and materials required:
- Flashlight or torch.
- Water bucket
- Drill and a twist bit
- Ladder
- Plastic sheet
- Dust mask, gloves, and eyeglasses
Place the plastic sheet on the floor and have the bucket placed on top of it, too, to collect dripping water. If your house has an attic space, use a ladder to safely get there and check for signs of water stains, black marks, or mold. Use the flashlight if it is too dark.
Drill a hole, carefully, at the center of the damaged area to release any concentrated water. You can cover the hole momentarily until you are ready to fix the entire damage.
If your house does not have an attic, you can check the roof for any signs of leakages. Ideally, look out for damp patches, black marks, water stains, or molds. If you rent the house, engage the property managers or landlord to have the leak repaired.

Perform A Rain Dance
Tools and materials required:
- Plastic sheet
- Water bucket
- Garden hose
- Ladder
- Roof safety harness (you can rent it for a day)
If checking the attic or roof does not help with identifying the leak, make it rain. If you have someone else at home, let them stay inside the house as you go to the roof with a garden hose and soak the roof. The person inside the house should hold or lay the plastic sheet and bucket on the floor and identify the leaking areas and shout immediately they see dripping water.

Identifying Plumbing Leaks
Tools and materials required:
- Flashlight
- Hole saw (to remove the ceiling surface)
- Seal tape
- Ladder
- Grout and grout sealer
- Ladder
If you are sure the roof leak is not caused by rainwater, the next step would be to locate plumbing leaks. Locate all plumbing lines on the roofing area and scale to them using the ladder. Ensure that you have your flashlight all the time if the area is dark.
Start with the plumbing lines serving the toilets and shower rooms and mark any affected areas. Use your hole saw to clear the affected area, but be sure to expand any damages to the plumbing lines. If you can take care of the leakages, you can start by sealing the pipes using the seal tape and other adhesives and then cover the area with the grout and grout sealer.

Identifying Pest Infestation-Caused Leakages
Tools and materials required:
- Pump sprayer
- Flashlight
- Nose masks, eyeglasses, and gloves
- Pest identification tools
Pests can cause roof and attic damage and open way for leaking water droplets. Where plumbing leaks are not apparent, the infestation of pests should not be ruled out. Go through the attic area with telescoping inspector meter, termite injector, or moisture meter to identify any possible damages made by pests such as rodents as well as their breeding grounds.

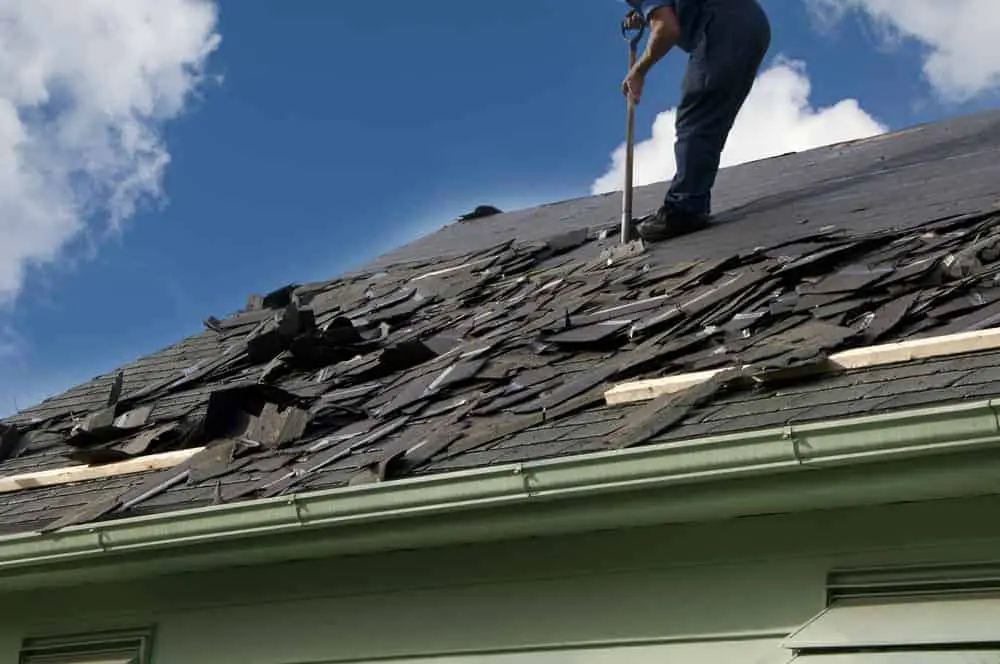
Tear of Shingles
If you are yet to identify the location of the roof leak, you can also tear off the shingles for a deeper assessment. You can start by stripping off the shingles around the area with signs of leakages such as molds and dampness. This step should, however, be the last option because it may result in additional repair charges.

Check Dormers
A roof leak may also be originating from your walls. While at it, you may then check any dormer walls around your house to identify any rot or cracks that may be allowing water to seep through.

13 Do-It-Yourself Roof Repairs
Sometimes, you may need to have quick fixes for a leaking roof before you can explore better and long-lasting solutions. You can, therefore, do repairs using temporary solutions such as using tarps and sealants.
If you are now tired of your roof leaking water into your houses, perhaps it is that time that you got the problems fixed. There are a number of do-it-yourself roof repairs that a pro or novice DIYer can work on and get their roofs repaired without spending too much. If you have a spirit of adventure and are a DIY enthusiast, here are some of the DIY roof repairs that you can carry out instead of calling an expert roofer.
- Fix 1: Fixing The Attic
- Fix 2: Fix Plumbing Vent Boots
- Fix 3: Fixing Plumbing Leaks
- Fix 4: Reapply Caulk Around Vents, Chimneys, and Window Edges
- Fix 5: Leaking Gutters Repairs
- Fix 6: Patching the Ceiling
- Fix 7: Fixing Shower Leaks
- Fix 8: Toilet Leaks
- Fix 9: Fixing Kitchen Fixture Leaks
- Fix 10: Flashing Damage Repairs
- Fix 11: Roof/Skylight/Vent/Chimney Leak Repair
- Fix 12: Fixing Damaged or Missing Shingles
- Fix 13: Metal Roof Repair
Fixing the Attic
TIME
COMPLEXITY
COST
Tools and materials required:
- Ladder
- Drill
- Seal tape
- Nail gun
- Grout and grout sealer
- Roofing sealant
If the attic space is the problem, it is important that you repair any open spaces that allow for water to infiltrate. If it is a wooden attic, ensure that the roof is fixed first, the open spaces and holes filled, and clogged water cleared. You may then replace any damaged wood and seal the open spaces.
For attics made of other materials, the same procedure should be followed. If it is cemented and you have the skills to repair it, you can go ahead with it, although you can enlist the help of a concrete worker if you are not well versed with it. If it is made of any other material, ensure to gather enough information and tips on how to work around it to seal any leakages properly.

Fix Plumbing Vent Boots
TIME
COMPLEXITY
COST
Tools and materials required:
- Ladder
- Flashlight
- Seal tape
- Tape measure
- Roof safety harness (you can rent it for a day)
- Others
If you are a motivated DIYer, you can replace any damaged vent boots. You may buy several of them, or as may be necessary from your local hardware store or buy on Amazon. If they are in good shape, the screws and rubber-washered ones may be the only one needing a chance to prevent water from seeping through the screw holes.

Fixing Plumbing Leaks
TIME
COMPLEXITY
COST
If your ceiling is leaking where there are no plumbing fixtures above, it may be because of burst drain or water supply pipes. This is not usual, but it may also happen, especially if the pipes were laid down years ago or you had metallic pipes installed and have started corroding. If this is your case, you can open the ceiling cavity around where the signs of a leak are to assess the condition of the pipes running and tighten any loose joints.
If there are faulty fittings or the pipes are leaking, they should be repaired or replaced with ease. A DIYer is capable of such repairs or replacement unless it requires an extensive replacement of plumbing pipes or a complete overhaul of the ceiling.

Reapply Caulk Around Vents, Chimneys, and Window Edges
TIME
COMPLEXITY
COST
Caulk is usually used for sealing seams and joints that are prone to leakages. Over time and due to exposure to different weather elements, it may wear out and create open spaces where water can seep through. If the leakage you identified is around the joints and seams, you may want to consider reapplying the caulk.

Leaking Gutters Repairs
TIME
COMPLEXITY
COST
Tools and materials required:
- Ladder
- Sealants
- Putty knife
- Cement
- Roof safety harness (you can rent it for a day)
Fixing leaking gutters can be as easy and take less time compared to other fixes. To repair leaks and holes, scrub of existing sealants and reapply patches and sealants immediately before moisture starts to accumulate. You may also use cement to patch small holes and spread it evenly using the putty knife.
To repair gutter seams, follow the following steps:
-
Clean the gutter using the putty knife and scoop all the leaves and other buildups. You may also water flush out the gutters using a garden hose.
-
Use a permanently flexible and water-resistant sealant to hold the gutters together or seal any holes.

Patching the Ceiling
TIME
COMPLEXITY
COST
Most of these emergency fixes may require you to tear up the ceiling. In this case, you will need to patch it up back and do it properly to prevent further leaking problems. The removed sections of the ceiling may be left open for several days to allow for fresh air and to give the ceiling cavity a chance to dry out.
To replace the ceiling cavity instantly may only mean that it will trap moisture above it and hinder the affected area from drying up. The presence of moisture will harbor the growth of mildew and mold, and the problem of water leaks will soon be back.

Fixing Shower Leaks
TIME
COMPLEXITY
COST
Any leaks below a shower room may be manifested in the rooms below them. If it is a story building, the most affected rooms may be other bedrooms, a kitchen, or living space below the shower room. In this case, there may be several causes of the leaks, and you can fix them yourself too:
-
Shower Surround Caulk Failure: – the caulk seals along the vertical seams between fiberglass surround panels and around the base of the shower may open spaces for leakages if they are broken. If that is the case, you can fix the situation by reapplying the caulk to seal off the breaking points.
-
Faulty Shower Door Seal: – a faulty shower door seal may also result in leaks, and the water may seep through the floor and roof of the rooms below. To fix this, you can install a shower door sweep – most designs allow for it to be snapped onto the door – and then apply silicone caulk along the base of the shower. If the leaking problem persists, it could be as a result of leaking plumbing lines which you can easily fix or call an expert if they are extensive.
-
Leaking Tile Grout: – if the tile grout on your floors is broken, water may find its way through the floor and seep out through the roofs of the rooms beneath. If this happens, you can reapply the grout and reseal the tiles.
If the problem persists, it may also mean that the tiles are compromised and would need major repairs and realigning. If you are a cool and enthusiastic DIYer, you can redo the tiling if you can lay your hands on a good tile leveling system.
Toilet Leaks
TIME
COMPLEXITY
COST
When the roof below a toilet starts leaking, it may be because of a drain problem. Some of the usual problems and their emergency fixes include:
-
Leaking Supply Tube or Shut-Off Valve: – the supply tube that channels waters to the toilet supply and the toilet’s shut-off valves may develop leakages. Even though this may be rare, the water may find a way to the roof of the rooms below the toilet. To keep watch of or rectify this, you can try tightening the supple tube connections and valves yourself or replace any that may be faulty beyond repair.
-
Failed Wax Ring: – often, toilets may be fixed using a wax ring that is applied to connect the toilet outlet to its drain pipe. Over the time of their usage, these rings may get cracked or age rendering them weaker, which may allow water to seep through and to the floor. If there is a room beneath it, the water may flow through and start dripping from its roof.
To fix this problem by yourself, you can replace the war ring and eliminate the leaks. This may also be a sign of other plumbing problems that you may also want to explore and fix.

Fixing Kitchen Fixture Leaks
TIME
COMPLEXITY
COST
Kitchen fixtures may also have leaks below them. The causes of such leaks and solutions are similar to bathroom leaks, and you can also repair them without an expert’s skills. Such leaks may be identified along drain fittings, water supply pipes, and shut-off valves, and fixing them can be done through simple plumbing fixes.

Flashing Damage Repairs
TIME
COMPLEXITY
COST
Tools and materials required:
- Plywood for replacements
- Roofing cement
- Drill and a twist bit
- Nails
- Nail gun or hammer.
- A square of shingles
Fixing a leakage caused by flashing damage may be a low to medium repair, but a passionate DIYer can pull it with ease. You will need to push the seams back down and secure them in place using nails if need be. After fastening them, apply the roofing cement around the edges of the flashing to create a watertight seal.

Roof/Skylight/Vent/Chimney Leak Repair
TIME
COMPLEXITY
COST
Tools and materials required:
- Cement
- Caulk
- Shingles
- Iron sheets or Plastic sheets
- Roof safety harness (you can rent it for a day)
Even the smallest roof leak needs to be repaired without hesitation. Depending on the roof type, you should waterproof it by either replacing the faulty materials or repairing the damaged patch. If it is caulk that has become weak, for example, you can reapply it and seal the empty spaces where water has been seeping through.

Fixing Damaged or Missing Shingles
TIME
COMPLEXITY
COST
Tools and materials required:
- Hook blades
- Hammer
- Roofing nails
- Flat pry bar
- Sealant
- Putty knife
- Self-adhesive waterproof underlayment
If you identified a leak coming through damaged shingles, you could replace them too. You only need to remove the nails holding them in place, scrape off any remaining cement, and lay down new shingles. Apply fresh cement for laying the shingles on and then nail them over the affected area.
Apart from replacing them, you may also opt to repair shingles depending on their state. If they are not entirely faced out or damaged, small repairs may come in handy. If the shingles have extensive damages, they may not hold because the winds that come in spring are strong and destructive when they come knocking.
Pass the flat pry bar underneath the damaged shingles and press it down to pop out the roofing nails. Remove the damaged shingles and place new ones aligning them with the others. Lift the remaining shingles on one edge and secure the new ones with the roofing nails.
If the shingles are cracked and not entirely damaged, you can have the problem rectified using sealants. Apply a think bead of the roofing sealant on top of the cracks, spread the sealant with a putty knife, and place the fixing parts on top of the cracks.
Metal Roof Repair
TIME
COMPLEXITY
COST
Tools and materials required:
- New metal sheet matching the existing one
- Wire brush
- Pencil
- Urethane sealant
- Roof safety harness (you can rent it for a day)
- Pan-head sheet metal screws
Clean up the affected area to expose the damage and assess the work needed. Scuff the affected surface (only) with a wire brush to ensure that the sealant will bond seamlessly with the metal. Measure the damaged area, mark it, and cut the chosen replacement sheet to fit at least two inches over the measurements.
Apply the urethane sealant to the surface of the existing sheet and ensure that there are no voids or gaps at the edges. Press the replacement patch over the damaged spot and attach it firmly with the screws around the perimeter. If you are certain the patch has been covered fully, you can then paint the area with paint that matches the entire roof panel.

Safety Procedures and Equipment
Safety is a significant consideration when carrying out roof repairs. Whether you regard yourself as a pro or are a novice DIYer, you should be wary of probable hazards that you may encounter and how to avoid them. Ideally, ensure that you conduct a thorough inspection of the entire roof to rule out other possible deteriorations before you attempt to climb to it.
Additionally, you should ensure to observe the following safety precautions:
- Use A Ladder: if you do not have a doorway or interior stairs to the roof, mount a ladder for climbing up the house. Also, ensure that the ladder is properly secured to the building as even if it is reliable, it can become unstable as Brian Impellizeri, senior product manager with GAF, a roofing manufacturer notes.
- Use A Hoisting Rope: – even if you are using a ladder, ensure to have a hoisting rope wound up around your waist to hold you just in case you slip. The rope should be attached to a firm position on the opposite side of where the ladder is.
- Exterior Egress: – apart from exercising caution when using ladders, ensure that you are keen when using penthouse doors, elevators, scaffolding, power equipment, and hatches.
- Skylights: – if there are skylights on your roof, ensure to not step on them as they may give in when too much weight is put on them.
- Watch Out for Loose Debris: – waste and construction materials, tools, tree branches, and leaves may pose a threat too. It is important to keep them at a safe distance from where you are working and also safe from strong winds as they may be flying debris.
- Parapet Walls: – a roof with no barrier on the edge can also pose a direct risk. Other buildings may have short walls that cannot hold and prevent you from tumbling down, which prompts you to get better harnesses and personal fall arrest systems (PFAs).
- Extreme Heat: – the roof is prone to excessive heat as it has direct contact with sunlight. The heat plus the roofing and repair works can dehydrate you within no time. It is, therefore, advisable that you avoid working for long on a roof that gets hot faster and avoid working under the sun for hours.
- Repetitive Injuries: – repairing roofs requires you to do more repetitive jobs at a go. Tasks such as lifting, climbing ladders, kneeling, using heavy tools, and standing for long may exhaust you or result in repetitive injuries. To ensure that you are safe from them, you can work in shifts and take rests in between.
- Keep Watch of Electrical Cables: – naked and hidden electrical cables may cause electrocution hazards if you come into contact with them. Before embarking on any repairs, ensure to identify them and mark them.
- Follow Regulations: – ensure to follow local authorities’ and other governing bodies’ regulations. The Occupational Safety and Health Administration (OSHA) is one such body and has insightful safety tips.
Also, you should have with you the following safety gear and equipment with you all the time:
- Earbuds
- Headgear
- Nose masks
- Eyeglasses
- Hand gloves
- Hoisting rope
- Overall or apron.
- Safety climbing boots.
To safely access roofs, the following are some of the typical methods that you can explore:
- Stair towers
- Traditional ladders
- Roof access hatches.
- General access scaffolds.
- Mobile access equipment.
- Fixed or mobile scaffold towers.
Conclusion
With the guide above, we hope that you will find it easy to identify and fix a leaking roof with ease. Additionally, you may want to seek professional advice from seasoned repairers and incorporate their guidance. Not to forget, you can share your comments, feedback, leave your questions, or give additional recommendations on the comments section below.
Resources and Further Reading
- Reducing Falls During Residential Construction: Roof Repair – OSHA
- How to Troubleshoot and Fix Ceiling Leaks – The Spruce
- How to Find a Roof Leak (So You Can Get it Repaired!) – Networx
- How to Locate a Roof Leak Before It Makes a Mess – Budget Dumpster
- Spring Home Maintenance – Buildipedia.com
- Summer Vacation Property Maintenance: Essential Checklists – Buildipedia.com
- Roof work – Health and Safety Executive
- How to Check and Maintain Roof Flashing – Modernize
- How Much Does It Cost To Repair An Asphalt Shingle Roof? – Home Advisor
- Asphalt Single Roof Repair – Home Advisor
- Fixing Damaged Roof Shingles – This Old House
- How To Fix Gutters With Sealants – Loctite
- How to Repair a Hole in a Metal Roof System – The Spruce
- Best Practices for Roof Safety – Buildings.com
- Roof Leaks Repair Cost – Fixr
- Is that Water Mark a Sign of Termite Damage? – Rentokil
- [Termite Control] Tools To Detect Hidden Infestation – PTC Online
Great content. Thanks for articulating it
This is great. Came at the right time