5 Easy to Install Landscape & Garden Edgings for DIYEnthusiast
How to Guides, Tips & Ideas
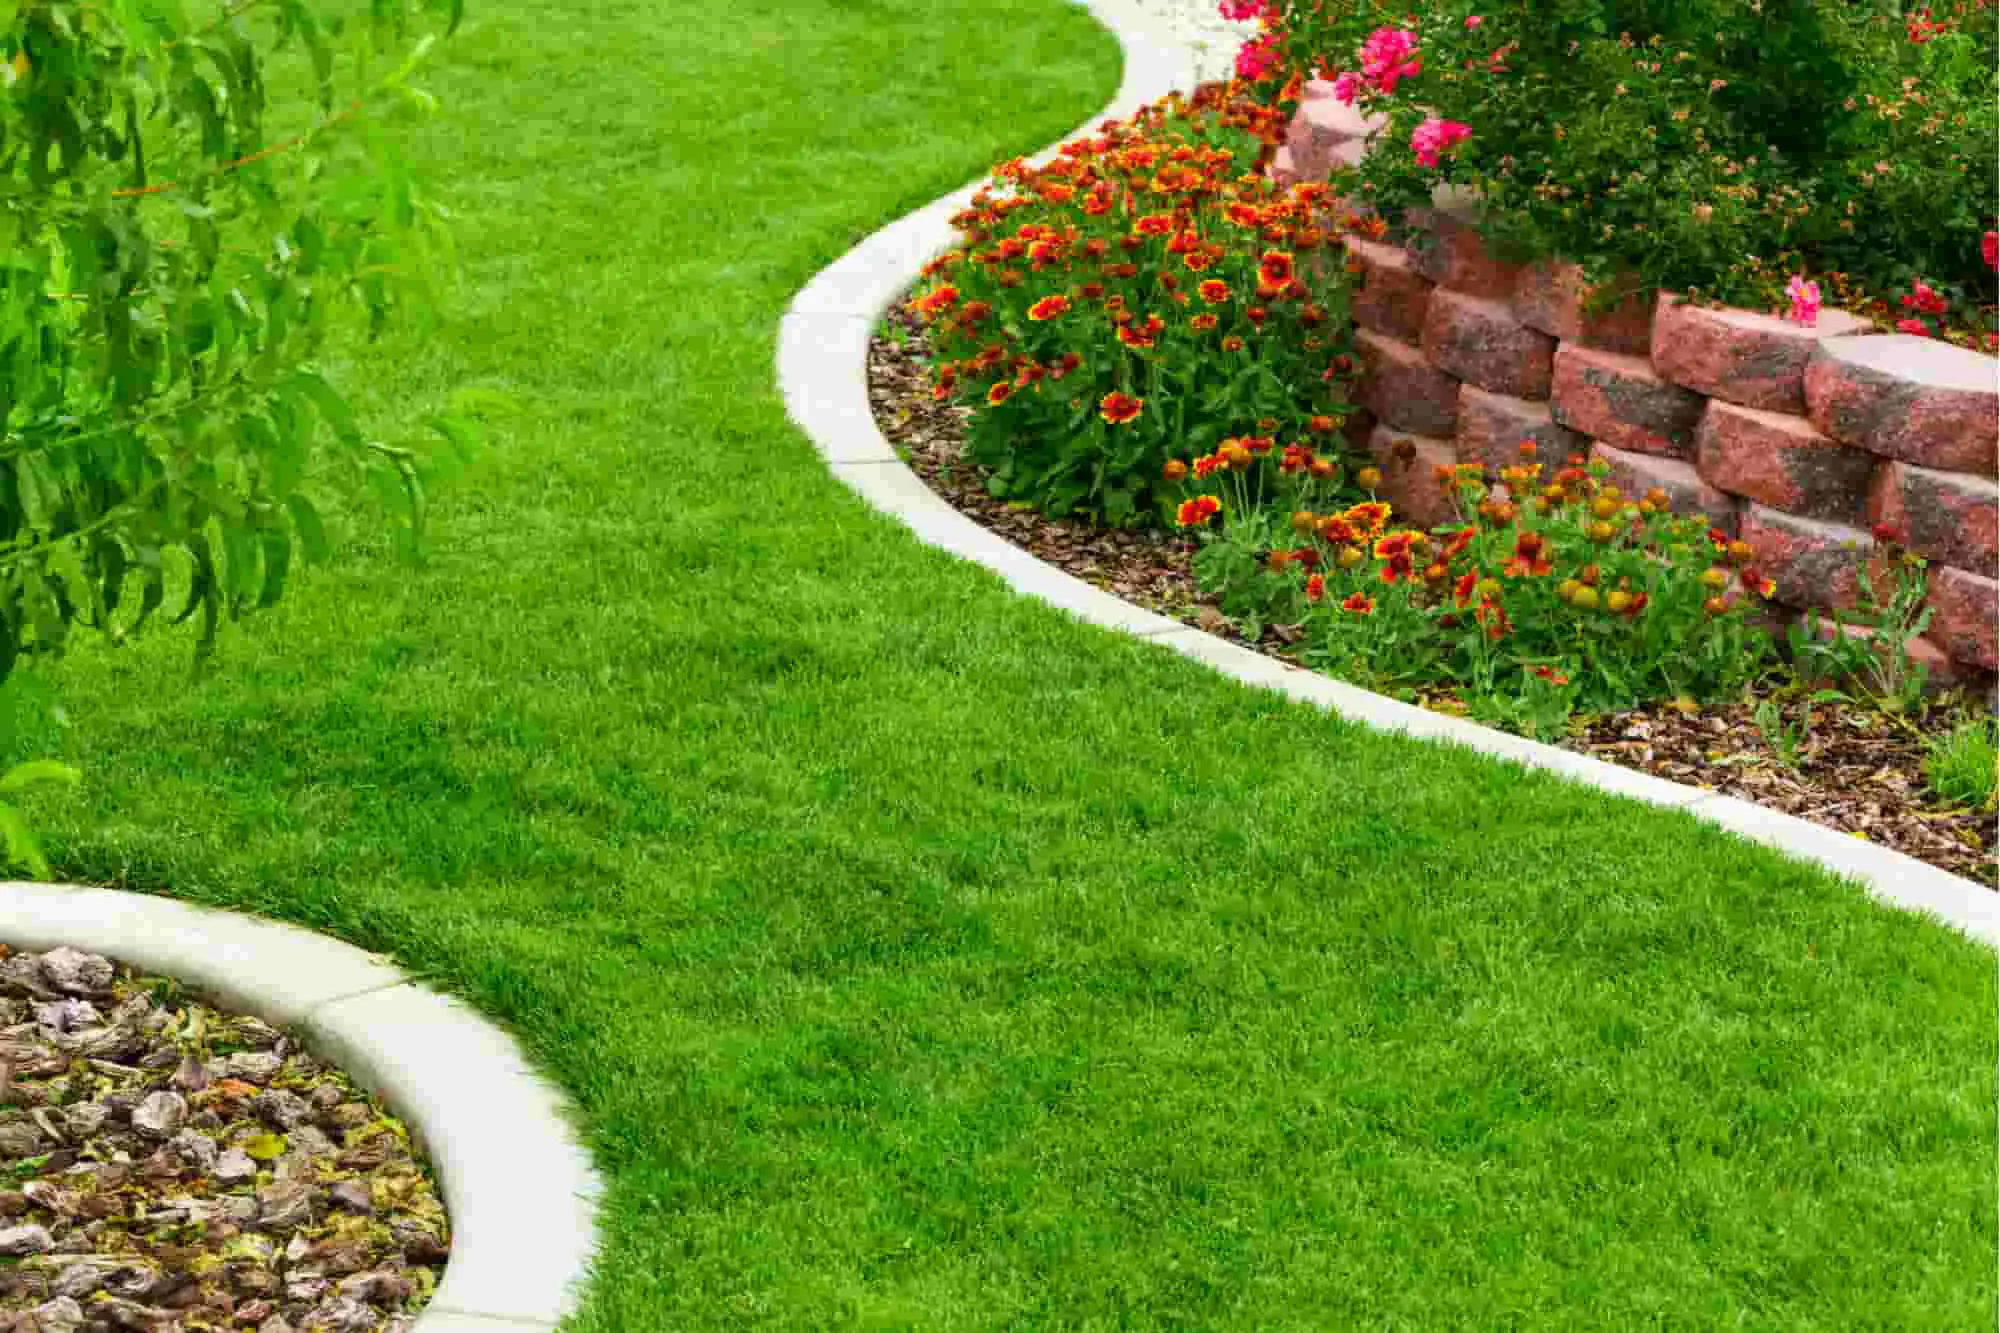
A landscaped compound or home garden can make a boring outdoor alive. They add beauty, curb appeal, and aesthetic advantage. If you install landscape and garden edging, you will get a more beautiful functional yard.
Not sure how to edge your garden? Let us help you do it in five different ways.
How to Easily Install Five Garden Borders: Step-by-Step Guides
If you need to install a garden edging, expect to learn how to do it here. We’ll walk you through five step-by-step guides, where you will easily learn how to make five different garden borders. It doesn’t matter whether you are a professional or a DIY’er enthusiast, follow the steps and get ready to have fun!
- How to install a no-dig garden edging
- How to edge a garden bed with brick, pavers, or stones
- How to install a basic garden edging with timbers, metal, or plastic
- How to install a Basic Premade Garden Edging
- How to install a garden raised bed border
How to Install a No-Dig Garden Edging
Creating a great garden takes time and effort. If you are looking for something quick and easy, you may want to look for the simplest techniques like creating landscape edging borders without digging deep into the Earth.
TIME
COMPLEXITY
COST
Required materials for this project:
- Tape measure
- 20” no-dig kit (Kit includes: 20-foot coil black landscape edging about 1.5 inches tall, one connector for a seamless border between edging, and six pieces 8-inch spikes to prevent the edging from moving).
- 12” no-dig tree ring.
- Extra anchoring spikes.
- Rubber mallet or hammer.
- Ready-to-use concrete mix bags.
Step by Step Installation Guide for No-Dig Garden Edging:
- STEP 1
- STEP 2
- STEP 3
- STEP 4
- STEP 5

Fit Edging Around a Garden Bed
Garden edging products come with standard sizes such as 20, 40, or 100 inches. What we are going to use here is the 20-feet no-dig edging assuming that your garden also measures like that. You can cut or extend it anyway to fit your specifications.
You need to make some measurements in your garden bed for the landscape border to perfectly fit. Edging can be good enough within a blink of an eye if you measure your yard right before purchasing any type of edging.

Clean up the border area
Sometimes there are soil, stones, leaves and even roots coming off the sidewalk. You can use shears to remove plant roots although you can leave the large ones and cut the garden border edging instead. For the soil and stones, you can use a scraper to remove them away so that you can have a clear space to work. For the leaves you can use a leaf blower or a rake.

Lay Out the No-Dig Garden Edge Kit
Get your garden borders and edging ready by layering out the thing around your planting bed or tree. With a rubber mallet, drive the spikes and ensure to use more for a stronger hold. The spikes should be placed at the right distance for them to hold firm enough. This plastic garden edging allows you to create the shape you desire.
Position the 12” no-dig tree ring to get a flexible border edging that provides a professional look. You can create aggressive curves and straight sections with this no-hollow round.

Prepare the Concrete
A concrete bed will help to support the edging for the gardens you are about to install. Since it is a no-dig one, you won’t need to break up the earth. A bag of fast-setting concrete mix will do best if you pour a generous amount over the edge of the plastic border and spread it evenly. Set the concrete completely by spraying a mist of water on it thoroughly and wait for it to cure.

Water Up
Unlike any other edging, no-dig garden bed borders do not need digging or burying. Whether you use concrete, stones, or large blocks, it is important to set the edging by pouring a liberal amount of water over the finished project.
Pros:
- No-dig needs less hard work: in this process, you may find everything easier on the back as you don’t need to dig and till to give the plants a beautiful image
- Fewer Weeds: tillage makes weeds germinate very fast. If you don’t want to have relationships with these undesirable plants, consider a no-dig option.
- No Damage to Soil Life: by digging the soil, you disrupt the habitat of beneficial organisms like bacteria. Installing a no-dig garden separator can help them remain intact.
Cons:
- Limited Scale: it is nearly impossible to use no-dig gardening in a large garden because it doesn’t provide the sharpest corners. It is rather great in square foot gardening.
- Prone to Damage: too much exposure to the sun can degrade the plastic materials used which calls for constant maintenance.
How to Edge a Garden Bed with Bricks, Pavers, or Stones
Brick garden edging uses certain boundaries to improve the curb appeal of a yard. You can also use pavers or stones to create striking definitions while placing grass aside. Here you will learn how to edge a garden bed with bricks, pavers, or stones the best way. Read on and see how you can make things handy.
TIME
COMPLEXITY
COST
Required materials for this project:
- Bricks, stones or pavers
- Rope
- Tape measure
- Circular saw
- Marker/masonry pencil
- Spade
Step by Step Edging Installation Guide with Bricks:
- STEP 1
- STEP 2
- STEP 3
- STEP 4
- STEP 5
- STEP 6
- STEP 7
- STEP 8

Create a Route for Brick Edging with the Rope
A rope is an easy and low-cost way creating the desired shape for your garden. Set the line of your course by positioning the rope around your planting bed to help you decide where the brick landscape edging will go.
Make sure to set stakes in the ground so you can cut pre-existing soil easily.

Mark the End
Get your marker handy and mark where you will cut the rope at. This will help minimize any worries with measuring. Make sure the rope follows the curves while placing above the grass line to get the perfect length for your flower garden border.

Use the Tape Measure to Find the True Length
Since a tape measure cannot follow a curved garden edging, measure the rope you marked instead and cut it to find the true length of your garden bed. Pull the rope with your hands then measure it. Divide the length in inches by 4 or by the width of the bricks tack.

File a Couple of Bricks or Pavers
Before you start digging trenches, file a couple of bricks or pavers first to determine how deep the trench would be. This will serve as a guide for uniform trenches both in size and level. Make sure to order the bricks close to one another.
If you are using stones, you need to place them in at least 3 inches thick and about 4 inches wide to prevent grass from growing up.

Fill the Gaps
Most curves always have gaps you need to work on. Use a masonry pencil to mark the bricks that you will use to cover the space. Following those marks, cut the keystones carefully using a circular saw or grinder fitted with a masonry blade. You can put water into the brick sparingly to avoid too much dust.
.

Dig the Trench
Dig a trench that is a bit wider than the length of the bricks using the spade. Make sure the trenches have straight sides to ensure to have landscape edging borders that do not mess. Get your tape measure once more and check the depth of the paver. It should be at least 6 inches deep for it to set flush in the ground perfectly.

Spread the Paver Base and Cement Mixture
Add the paver base in small batches and spread the material evenly throughout the trench. Continue to add a paver base pack until the depth of the trench is equivalent to the thickness of the brick. After that, cover it with stone dust and cement mixture to create a much stronger base

Lay the Bricks
Press the bricks into place and make sure the gaps are properly covered. You can pour polymeric sand over them and sweep it into the spaces. Finish the project by spraying water gently to lock the bricks in place.
Pros:
- Elegant and Classic: Using bricks and pavers as decorative edging provides a great deal of versatility.
- Lower Maintenance: With bricks, you don’t need to mind painting. There are different designs to choose from which can easily be cleaned.
- Durable: Bricks are one of the best edging tools for landscaping known for strength and durability as the materials can withstand different weather conditions.
Cons:
- Old Fashioned: Bricks look great, but their overall design is not a modern one. It is ideal for old home gardening.
How to Install a Basic Garden Edging with Timbers, Metal, or Plastic
One other DIY garden edging you can learn about now is creating a beautiful, functional garden with timbers, some notes of metal, and plastic materials. Learning how to edge a garden bed with these borders can create a fresher look to your yard with no or little maintenance.
TIME
COMPLEXITY
COST
Required materials for this project:
- String
- Stakes
- String level
- Tape measure
- Landscape timbers
- Circular saw
- Drill and drill bit
- Metal Corner Braces and Screws
- Small sledgehammer
- Hand tamper
- Shovel
Step by Step Edging Installation Guide with Bricks:
- STEP 1
- STEP 2
- STEP 3
- STEP 4
- STEP 5

Make a Border Path
The first step is to decide how big your edging should be. Drive some stakes into the ground using the sledgehammer and tie the string around them. The stakes will help to line up the string straight and level.

Level the Ground
Dig out roots, rocks, unneeded soil, and other obstructions from the ground. You can use your shovel to remove them. You may also need to trim some branches or hedges. Then use hand tamper or the string level to balance the area properly. The ground should be flat enough to make the landscape timbers set firmly. This makes it easy to create returns for the ends of your planting borders.

Measure, Mark and Cut the Timber
To get your timbers uniform in size, measure the length of the wood you need to cut with a tape measure. You can use one with four sides. Mark the cutting line to tear all their sides and faces apart easily. Cut the timbers with a circular saw or hand saw following the cutting line for a smooth and uniform cut.

Join the Cut Pieces Together
You can use metal corner braces and screws to attach the end part of the cut pieces. Use your drill and drill bit to make holes on the wood and then attach the screws.
Doing so will provide a strong hold on the wood edging. It can also help you position each corner in your flower bed without a hassle.

Lay Out the Timbers
Edging for flower beds becomes easy when you have everything ready. At this point, all you need to do is to lay out the timbers and make sure they are in the perfect place and arrangement along the entire run. You can secure the timber border once more by drilling holes and pin the timbers down to the soil. Finish the project by removing the sticks and string.
.
Pros:
- Fresh and Natural Look: Nature is always beautiful and using wood or timber as one of the best landscape border ideas is no different.
- Budget-friendly: Wood is a cheap material. It is still possible to install metal or steel garden edging but it will cost you more.
- Durable and Long-lasting: Durable and high-quality wood such as Redwood and Cedar may last for years.
Cons:
- Not Tough Enough: This flexible garden edging provides some notes of durability, but it would still deteriorate a bit faster than metal, plastic and bricks materials.
How to Install a Basic Premade Garden Edging
Learning how to install garden edging takes time, but you can now find ways to do it in no time. One best thing you can do is to use basic premade garden edgings that suit your budget. When it comes to the yard, learning how to install landscape and garden edging is important in all cases. Below are some easy steps to follow to create a border with less effort.
TIME
COMPLEXITY
COST
Required materials for this project:
- Steel or Aluminum (or Plastic)
- Spade
- Spikes
- Hammer
- Hacksaw
Step by Step Installation Guide for a Basic Premade Garden Edging:
- STEP 1
- STEP 2
- STEP 3
- STEP 4

Dig a Trench
While learning how to install landscape edging, you should give more importance to digging. Digging breaks up the soil giving plants enough light to grow. Make sure to dig a trench by using a spade along the length of your garden area so you won’t miss a thing.

Place your Edging
Premade landscape edging ideas can be positioned in your garden without a hassle as they only need a few touches. You don’t need to worry about high maintenance either. You can place your steel or aluminum garden edging right at your cleaned yard. For curved landscape edging, you can cut any excess edges with a hacksaw.

Hammer Spikes
Connect the boards by hammering the spikes with about 45-degree angle. Make sure to get them through the holes for precision. Check for obstacles such as tree roots. You can skip the loop and stake the next spikes

Add More Soil, Compact and fill in the trench with Garden Edging Stones
Once you get your plastic, steel or aluminum edging installed, you can add more soil and compact it with your foot to enhance settling.
Garden edging stones can add aesthetic appeal to your landscape while allowing you to enjoy maximum use of your yard. Make sure to pour a liberal amount to your trench and level the base as straight as possible. Also, remember to mower the lawn of your yard on a regular basis.
Pros:
- Less Hard Work: Since you got something premade, you can skip the hustle and bustle of making your edging.
- Low Maintenance: Basic premade garden edging demands less maintenance.
Cons:
- Corrosion: Steel, aluminum, and metal are prone to corrosion. Plastic, on the other hand, may degrade over time demanding replacement in such a case.
How to Install a Garden Raised Bed Border
Whether it is your first time picking up a shovel or not, using raised beds as one of your lawn edging ideas is a challenge. It can also be one of the most productive ways of growing crops and controlling soil conditions. If you aren’t sure what type of raised beds you would like and how to get started, read through for insights.
TIME
COMPLEXITY
COST
Required materials for this project:
- Wall blocks
- Paver base
- Construction adhesive tubes
- Shovel
- Tamper
- Rubber Mallet
- Level
- Compost
Step by Step Installation Guide for a Raised Garden Bed Border with Stone:
- STEP 1
- STEP 2
- STEP 3
- STEP 4
- STEP 5

Determine the Bed Size and Layout
A tall garden edging that is about 4 feet wide is better. Making a raised garden bed this way can help you easily reach the center while you plant anything you like. Ideally, it is good to have a depth of between 12 and 24 inches and a few inches’ allowances for wheelbarrow access.

Prepare the Site
Choose a site that is level to save time from digging trenches. Make sure it has good soil, enough sunshine access, and water. Soil condition is important because it could affect the health and growth of your plants and can make the yard edging difficult. If you find one that is hard enough, use a tiller or a shovel to loosen it. A site with the best drainage should also be considered.

Spread Out Paver Base
A paver base requires less digging and eliminates heavy gravel filling. You can include this technique in your landscape edging stone construction to save time and money without damaging the soil. Level the base as you go side to side and front to back. You can use a rubber mallet or tamper to adjust the leveling.

File the Blocks
No matter what types of landscape edging you use, it is important to file the material one at a time. Here you need to set the first block in place, followed by the second block, the third, and so on. Make sure to complete each course using adhesive tubes or cement before adding the stones.

Add Rich Healthy Soil
Adding more soil can keep water from draining and help your veggies’ roots to grow faster. You can have your soil mixed with compost and other healthy ingredients to make sure the garden border is doing the best and beautiful results in your plants. You can buy high-quality yet affordable soil in the market or make yours instead.
Pros:
- Prevents Backaches: One of the best landscape edging options that help in preventing bending over is the raised garden bed border.
- Soil Control: When it comes to the comparison of planting directly into the ground versus making raised beds, a raised garden bed border allows you to manage the soil better.
- Minimize Weeds: This type of garden bed edging can minimize or even block weeds if you place a plastic mat or cardboard at the bottom.
Cons:
- Extra Cost: Money is an issue in this garden edging process as you will need more materials to make your regular garden raised
Safety Procedures and Equipment
Before you install any decorative garden edging, it is important to ensure safety procedures are in place. Follow the procedures by wearing:
- Safety goggles
- Safety footwear
- Safety gloves to protect
If it is your first time working on such a project, it is vital that you follow the manufacturers’ instructions provided for each of the materials you purchase.
The equipment you use such as hammers, shovels, saws, anchoring spikes, and any other tools should be handled with care. Failure to observe care results in injuries and health implications too.
Also, do not forget to engage the local utility companies to locate underground lines before installing any DIY concrete landscape ending. After all, you would not want to unearth power or gas lines since the implications may be unmanageable.
Conclusion
Learning how to install landscape edging is a challenging yet fun job. Everything listed in this article is meant to ensure you get desirable results. However, you can go a bit rogue and explore your ideas too. Bear in mind that when it comes to garden bed edging ideas, your imagination is the only limit!
Which of the above ideas did you like the most? We would like to hear your views by commenting below.
Resources and Further Reading
- https://en.wikipedia.org/wiki/No-dig_gardening – Wikipedia
- https://www.youtube.com/watch?v=QL9EhQpiex0 – Northland Monument
- https://homeguides.sfgate.com/plastic-edge-molding-landscaping-47855.html – Plastic Edge Molding for Landscaping, Homeguides
- https://homesteadontherange.com/2018/08/06/pros-and-cons-of-no-dig-gardening/ – Pros and Cons of No-Dig Gardening, homestead on the Range
- https://en.wikipedia.org/wiki/Brick – Wikipedia
- https://extension.oregonstate.edu/sites/default/files/documents/1/howtoinstallpavers.pdf -10 Step Guide to Installing Pavers, oregonstate.edu
- https://www.thisoldhouse.com/how-to/how-to-edge-garden-bed-brick – How to Edge a Garden Bed With Brick, This Old House
- https://www.youtube.com/watch?v=DZmR4A0-1ZU – How to Edge a Garden Bed With Brick, This Old House
- https://en.wikipedia.org/wiki/Angle_bracket_(fastener) – Wikipedia
- https://www.youtube.com/watch?v=SqetsVrgOEA – How to Create Wooden Garden Borders, Mitre 10 New Zealand
- https://www.youtube.com/watch?v=YWnB_RtIoac – How To Make Basic Garden Edging, 21st Century Caveman
- https://www.thespruce.com/easily-install-a-landscape-timber-edging-2132416 – How to Install Landscape Timber Edging by David Beaulieu, the spruce
- https://en.wikipedia.org/wiki/Spade – Wikipedia
- https://www1.agric.gov.ab.ca/$department/deptdocs.nsf/all/agdex13331 – Ministry Agriculture and Forestry Alberta
- https://www.youtube.com/watch?v=l8_QD8Ugw9A – Permaloc Aluminum Landscape Edging Installation Instructions, Permaloc Edging
- https://www.landscapingnetwork.com/lawns/edging.html – Landscape edging options, LandscapingNetwork